Google Analytics - Remove Your IP Address
In Google Analytics you can remove your own IP address from being recorded. This is useful if you visit your website a lot. If you, or your team members go to your website a lot to edit and update it, or visit it for other reasons, you’ll want to remove your, and their, IP addresses.
If removing your, and your team members IP addresses is important to your analytics, you’ll need to first get your IP address. You can do this at What Is My IP Address.
Copy your IP address for pasting into the correct field later on.

Log into Google Analytics
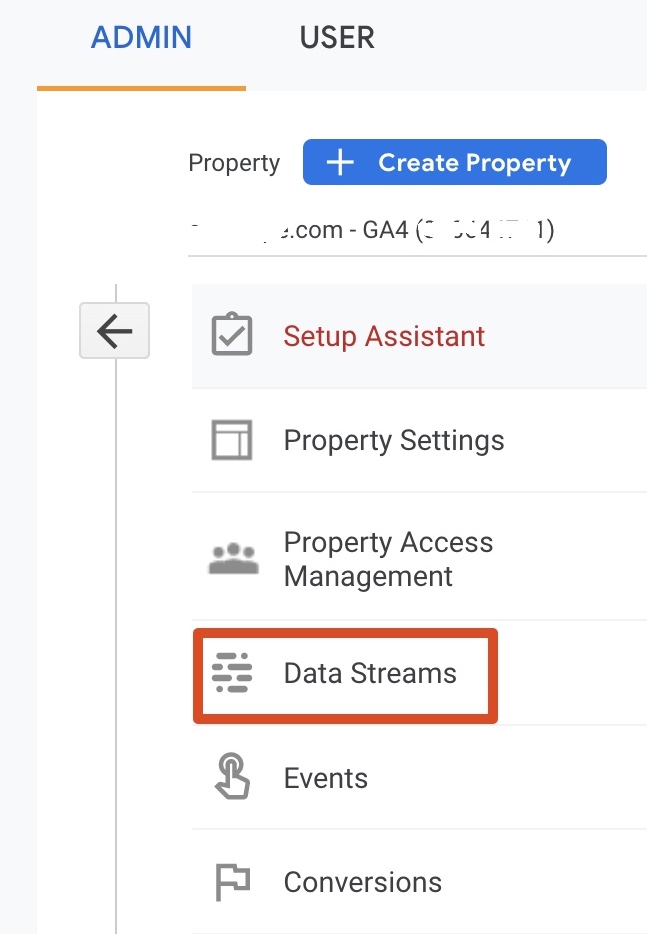
With your IP address copied, log into your Google Analytics account. Navigate to Admin (the cogwheel bottom left) and choose the Property Column. 4th down is Data Streams. Click on this.
Here you should see the notification confirming your site has been receiving traffic in the past 48 hours.
If you do not see this, the tag may either not be installed or may not working. You’ll need to trouble-shoot that issue.
If you do see that traffic has been successfully received in the past 48 hours click on the reveal arrow on the right. This opens the Web stream details window.
You may need to be patient with the right reveal arrows - they can sometimes take a little time to open up.
Web Stream Details
This has 3 main sections
- Stream details
- Events
- Google Tag
You’ll be pleased to know we are ignoring most of this and keeping the settings to their default values. However, we will explore Configure tag settings which is in the 3rd section, Google Tag.
Click on the reveal arrow that is on the right hand side of the Configure Tag settings section.
In the settings section, click on the light blue button Show all. There are 8 rows in this section. The 5th row down is Define internal traffic. Click on the reveal arrow that is on the right hand side of this row to create a new rule.

IP Address – Create Rule
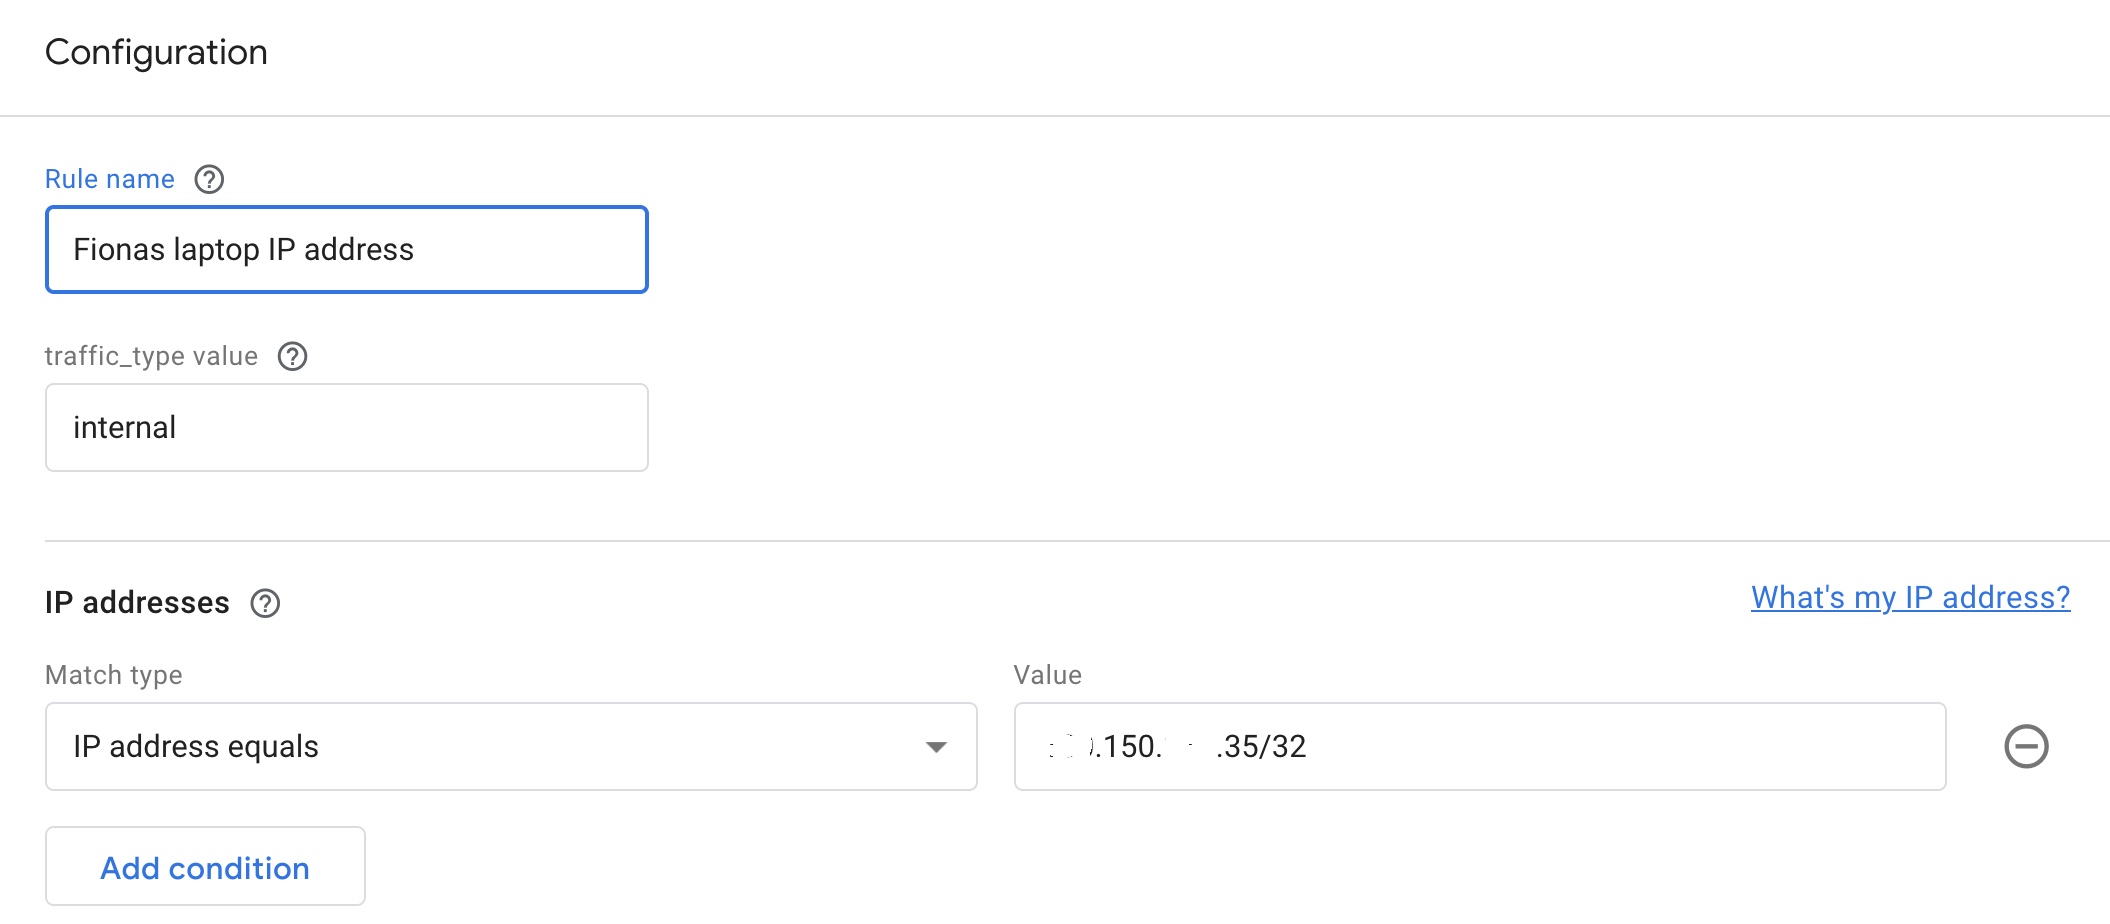
- Add a name for the IP address (best to name it with the person’s name and device)
- Keep it to the internal default value
- Change it to IP address equals
- Paste in the IP address
- Click on the blue Create button (top right)
PS - you may need to add a “/32” at then end of the IP address so that it meets CIDR notation requirements (it’s a very odd instruction I know – but it worked for me).

When Finished
- Close the internal traffic section window by clicking on the “X” top left
- Close the Google tag section window by clicking on the “X” top left
- Close the Web stream details section window by clicking on the “X” top left
IP Address – Activate Rule
Click on Data Settings via the left hand side navigation menu. This opens up 4 options. Choose the 3rd option Data Filters. Click on the reveal arrow that is on the right hand side of the data filters row.
- Change the filter state from Testing to Active
- Click on the blue Save button (top right)
- Click on Activate filter
A message will come up suggesting you test it before making it active. If you want to come back in a few weeks and do this, once it is tested, by all means do. But most clients I know just want to get the job done here and now.
When finished the Data filters screen will be the active one. Job done - you can now log out of Google Analytics.
Why the Bubble?
If you don't remove your IP address from Google Analytics you might be living in a bubble - thinking your website is getting lots of visitors. But those visitors may be you! Removing your own IP address from your Google Analytics is recommended.

SEO Course
A practical, step-by-step video course with screenshots, examples, explanations and demonstrations. Carefully created and produced video tutorials for your learning.
Especially suitable for e-commerce sites or multi-page websites.

