Take action on your Google Analytics account
If you’re a business with a legacy (i.e. older than 2 years) Google Analytics account you are likely receiving emails from Google Analytics telling you to take action.
In this situation you either need to create your G4 Google account if you haven’t already or set up the G4 Google account to get the most out of the features it offers.
Many small businesses and marketing staff are struggling to understand what needs to be done and why.
Here’s a step-by-step guide for the basic setup
Our guidance is for those business who want their analytics account to tell them
- How many visitors the website is getting
- Where the visitors are coming from (eg. organic search, paid ads or socials)
- How long the website visitors are spending on the site
- What pages are the most popular
This article is not good advice for those businesses who wish to use analytics for more advanced measuring, for example
- Linking to Google Ads
- Defining Audiences
- Measuring Conversions
Therefore this article is not recommended for e-commerce shops, businesses with advanced marketing funnels and other sophisticated websites.
Log into Google Analytics
- Log into your Google Analytics Account
- Navigate to the G4 Property

Check Your Tag is Installed
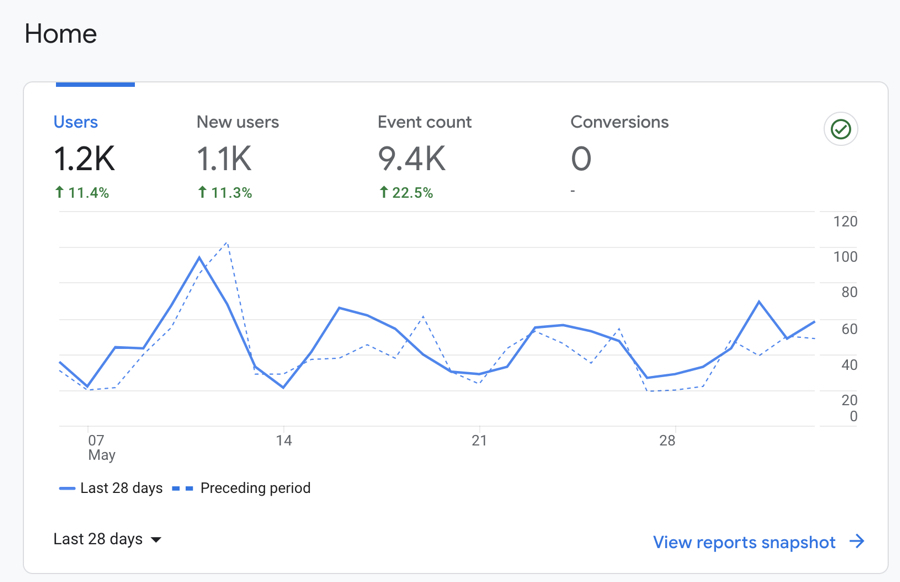
Check you are receiving data, that is, that your website successfully has the Google Analytics tag installed and analytics is seeing and recording visits to your website. To check this, the graph on the dashboard should not be a flat line – it should show you that users are coming to your site, as in the graph below.
If it is a flat line, the tag is either not installed or not working. Check out Google’s article and video on how to get this done.

Set up G4 Property
Once you’re confident your G4 property is collecting data, you can take the next step to complete the G4 set up.
- Click on the red “Complete setup” button at the top right

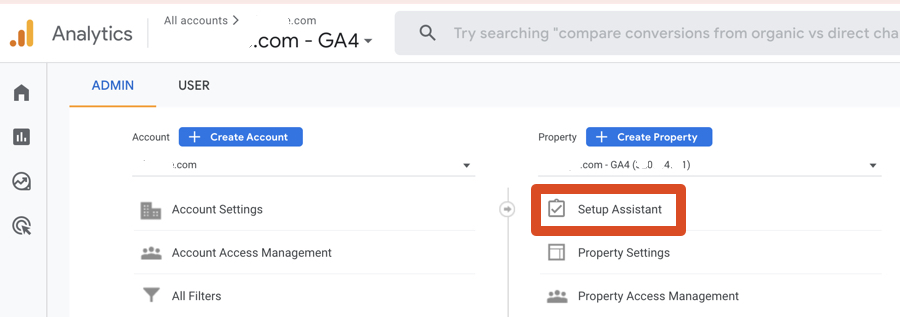
If you don’t see a red button, navigate to the set up assistant via Admin (cogwheel bottom left) and choose the Property Column.

This should get you to the set up assistant. Here you are likely to see a green bar with 0/7 marked complete.

In this blog article we will be showing you how to:
- Change the default data retention from 2 months to 14 months
- Mark everything as complete
By marking everything as complete you'll still be able to view the important data, such as how many visitors your website is getting and where they are coming from.
As an optional extra you may wish to remove your own IP address, which we show you how to do in this article.
Data Retention to 14 months
Click on Data Settings via the left hand side navigation menu. This opens up 4 options. Choose the 2nd option Data Retention.
- Change the option from 2 months to 14 months
- Keep reset user data on new activity to default on
- Click on the blue Save button
When Finished with Data retention, go back to the Setup assistant, via the left hand side menu.
Set / Check Time Zone
Click on Property Settings via the left hand side navigation menu. Check the time zone settings are right for your location.
When Finished with Data retention, go back to the Setup assistant, via the left hand side menu.

Set up Assistant - Mark as Complete
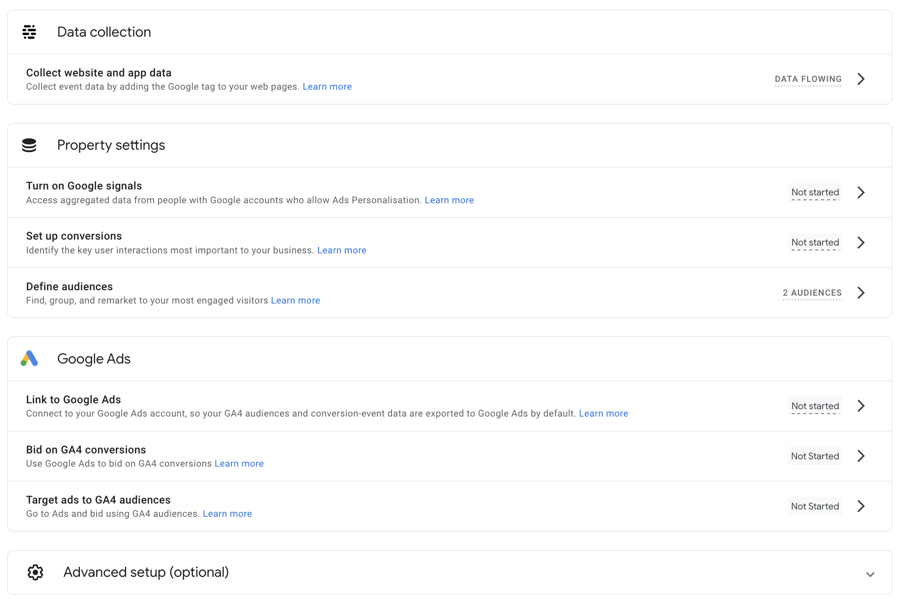
The Set up Assistant has 4 main sections
- Data collection
- Property Settings
- Google Ads
- Advanced setup (optional)
We’ll be marking these as complete.

Data Collection
Go to the Data Collection section. Hover over the reveal arrow to the right of Collect website and app data and click on Actions. If you are confident analytics is collecting data from your website, mark as complete.
If you want to take a peek, click on manage data streams. Here you should see the notification confirming your site has been receiving traffic in the past 48 hours. If you do not see this, the tag may either not be installed or may not working. You’ll need to trouble-shoot that issue as a priority as. See the section above - Check Your Tag is Installed.
If you took a peek, navigate back to the set up assistant via the left hand side menu and now mark this as complete.
Property Settings
- Turn on Google signals – mark as complete
- Set up conversions – mark as complete
- Define audiences – mark as complete
Google Ads
- Link to Google Ads – mark as complete
- Bid on G4 conversions – mark as complete
- Target ads to G4 audiences – mark as complete
Advanced Setup
Don’t worry about it – keep everything as default.
The green bar will now show as 7/7 marked complete!


SEO Course
A practical, step-by-step video course with screenshots, examples, explanations and demonstrations. Carefully created and produced video tutorials for your learning.
Especially suitable for e-commerce sites or multi-page websites.

